
Want to offer more than one map without forcing players to start from scratch each time? An ARK cluster lets you link multiple ARK servers so players can travel between maps with the same character, gear, and dinos. It’s the go-to setup for communities that want variety: one map for base building, another for boss fights, and a third for farming.
In this 2026 guide, you’ll learn how to create your ARK servers, build a cluster in the MineStrator panel, link each server, and test transfers through an obelisk. Let’s get your cluster online and ready for cross-map adventures.
What an ARK cluster does
An ARK cluster is a shared link between multiple ARK servers that enables cross-server transfers. Your players can move their survivor to another map, upload and download items, and transfer creatures using obelisks (and other transfer points depending on your setup). It’s perfect for running a multi-map network while keeping progression consistent.
Once the cluster is created, you simply attach each server to it, restart, and transfers become available in-game. The panel handles the heavy lifting, so you don’t need any complex manual wiring.
Step 1: Create your ARK servers
Before you can build an ARK cluster, you need at least two ARK servers (pods). With MineStrator MyBox, you can create multiple ARK servers inside one package by distributing the available resources between them.
Open your MyBox management area in the panel.
Create your first ARK server with a map (for example, The Island).
Create your additional servers (for example, Ragnarok, Aberration, etc.).
Adjust the resource distribution to match your needs.
💡 Tip: Split RAM and CPU fairly at first. After a few play sessions, check usage and then boost the busiest map.
Step 2: Create the cluster
Now you’ll create the cluster from the settings of any one of your ARK servers. Once created, it becomes available across all your ARK servers in the panel.
Open one of your ARK servers in the panel.
Click the Settings tab.
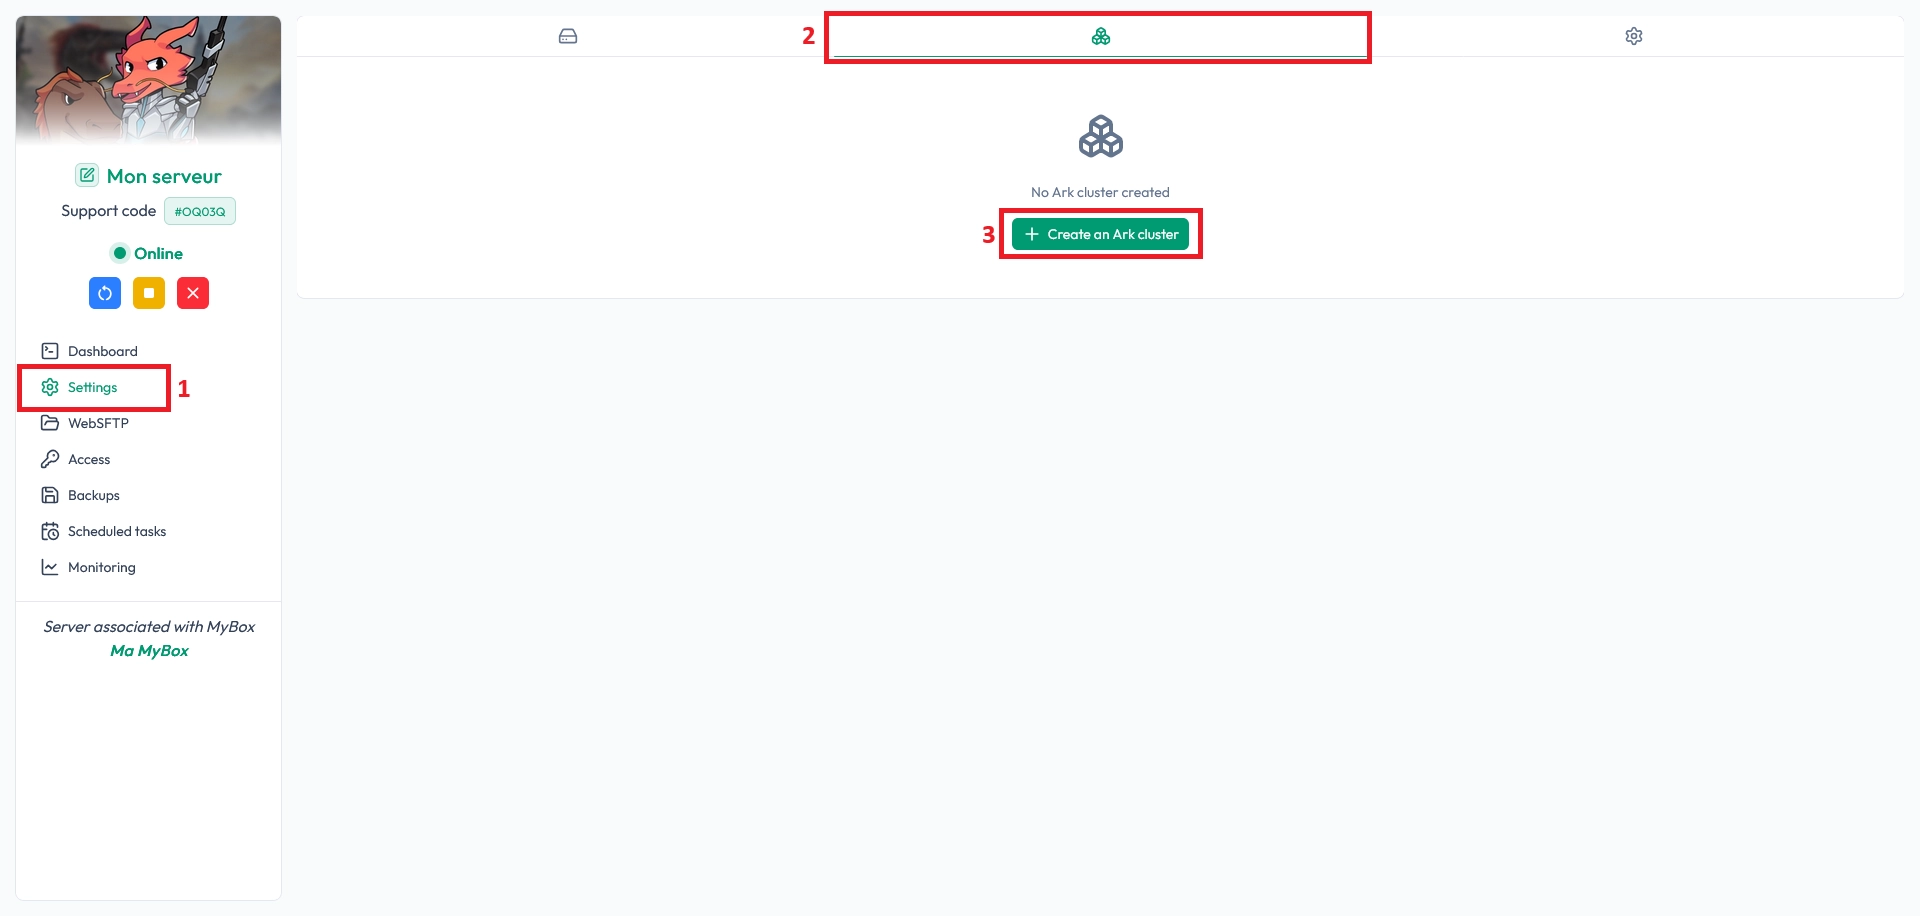
Open the cluster tab and click Create an ARK Cluster.
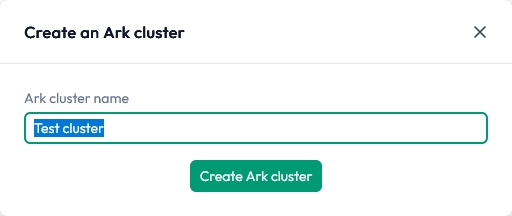
Enter a name in Cluster Name.
Pick a descriptive name you’ll recognize quickly (for example, “CommunityCluster-2026”). You can rename it later without breaking the link between servers.
Click Create a cluster.
🚨 Important: After creation, the cluster appears on all your ARK servers and can be used to link any of them.
Step 3: Connect servers to the cluster
This is the step that actually links your maps together. You must repeat it for every server you want inside the ARK cluster.
On the server’s Settings page, find your cluster in the list.
Click Associate server to attach this server to the cluster.

Restart the server to apply the change.
📝 Note: If transfers don’t show up in-game right away, a restart is almost always the missing piece.
Step 4: Advanced cluster options
Once your first cluster works, you can scale it for international players or split your network into multiple playstyles. These options help keep your community organized and your maps focused.
Link servers across regions
MineStrator infrastructure supports clusters between France and US servers, which is great for international communities. To connect servers from different regions, follow the same process as Step 3. No special configuration is required.
💬 Good to know: Cross-region clusters are ideal when you want a single network, but still keep servers close to players geographically.
Run multiple independent clusters
You can create separate clusters for different gameplay experiences, so players don’t mix progress between worlds that shouldn’t connect.
PvP Cluster: Combat-focused maps and rules.
PvE Cluster: Cooperative progression and exploration.
Event Cluster: Temporary maps for seasons or special events.
⚠️ Warning: One server can only belong to one cluster at a time.
Step 5: Test transfers in-game
Time for the fun part: verifying that your ARK cluster works as expected. The fastest test is to transfer a survivor and confirm you keep your character and items.
Join your first server.
Create a character and pick up a few items.
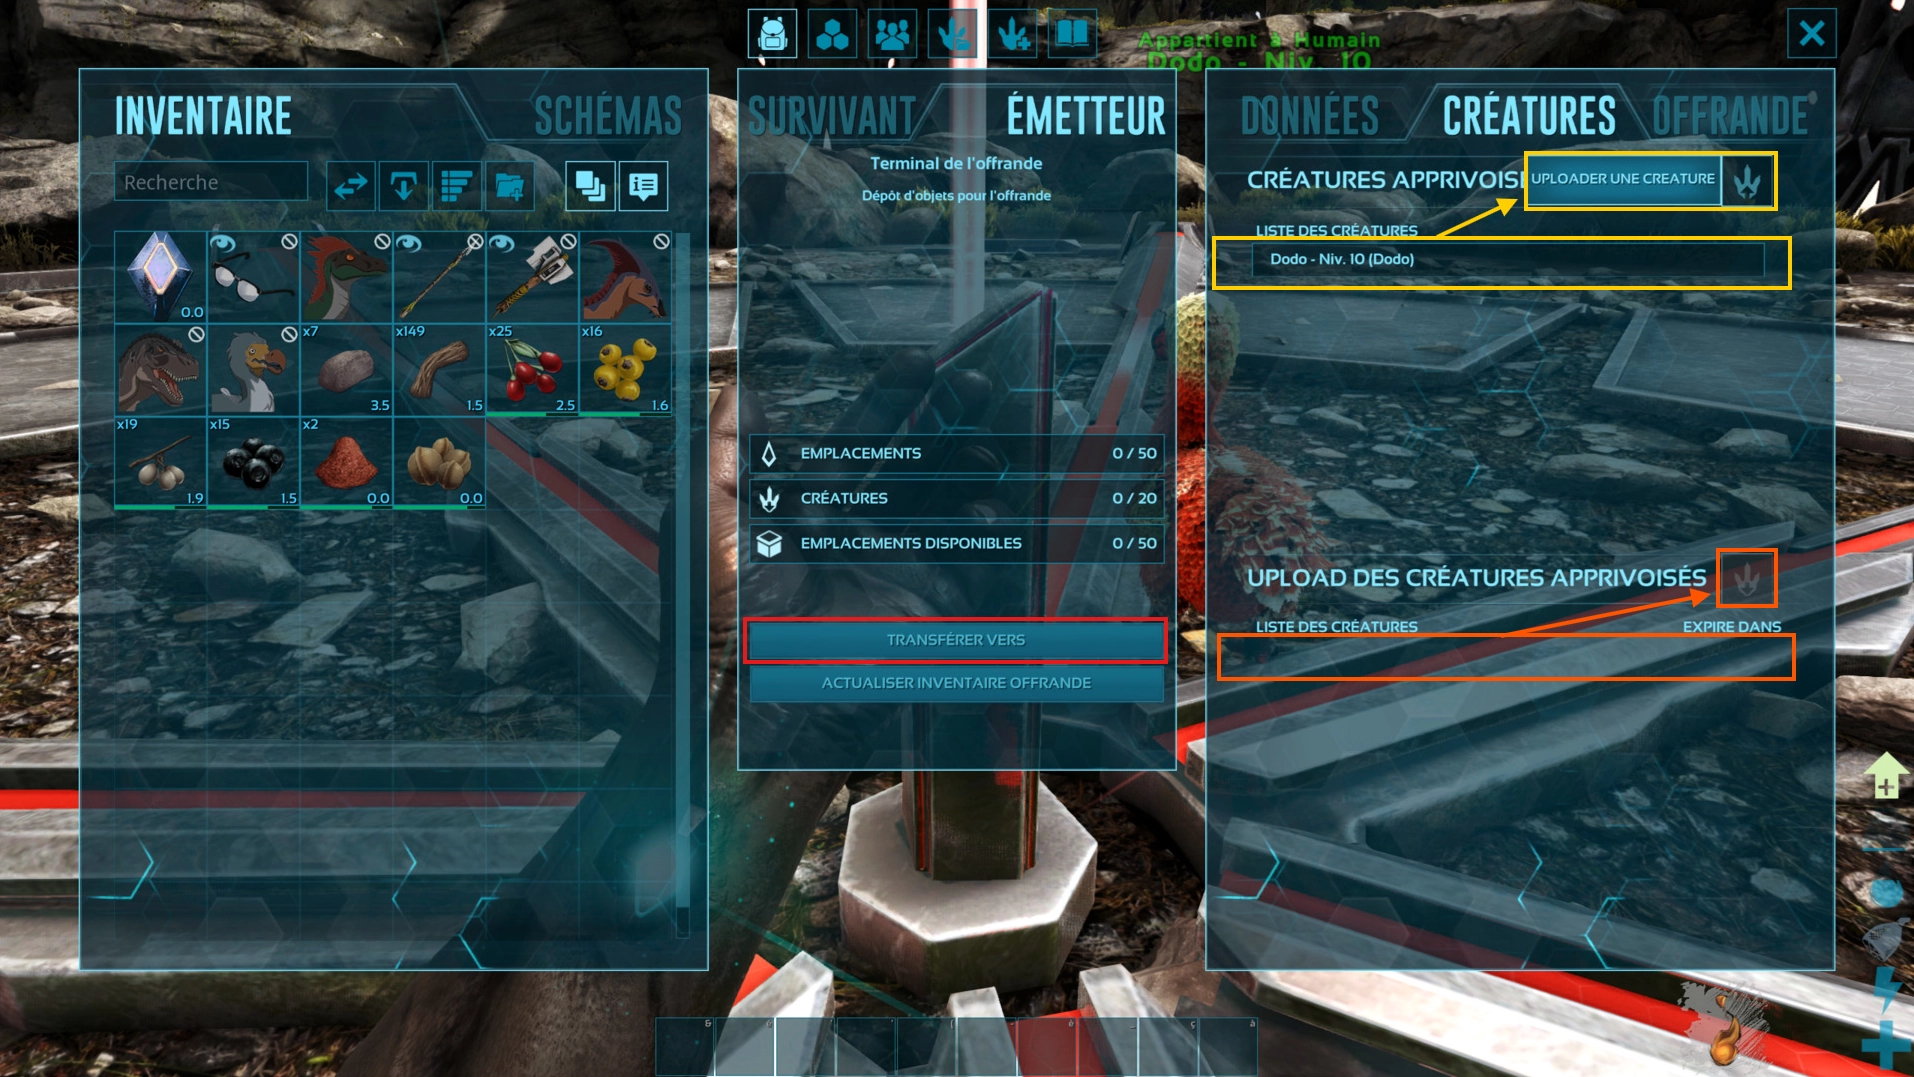
Go to an obelisk.
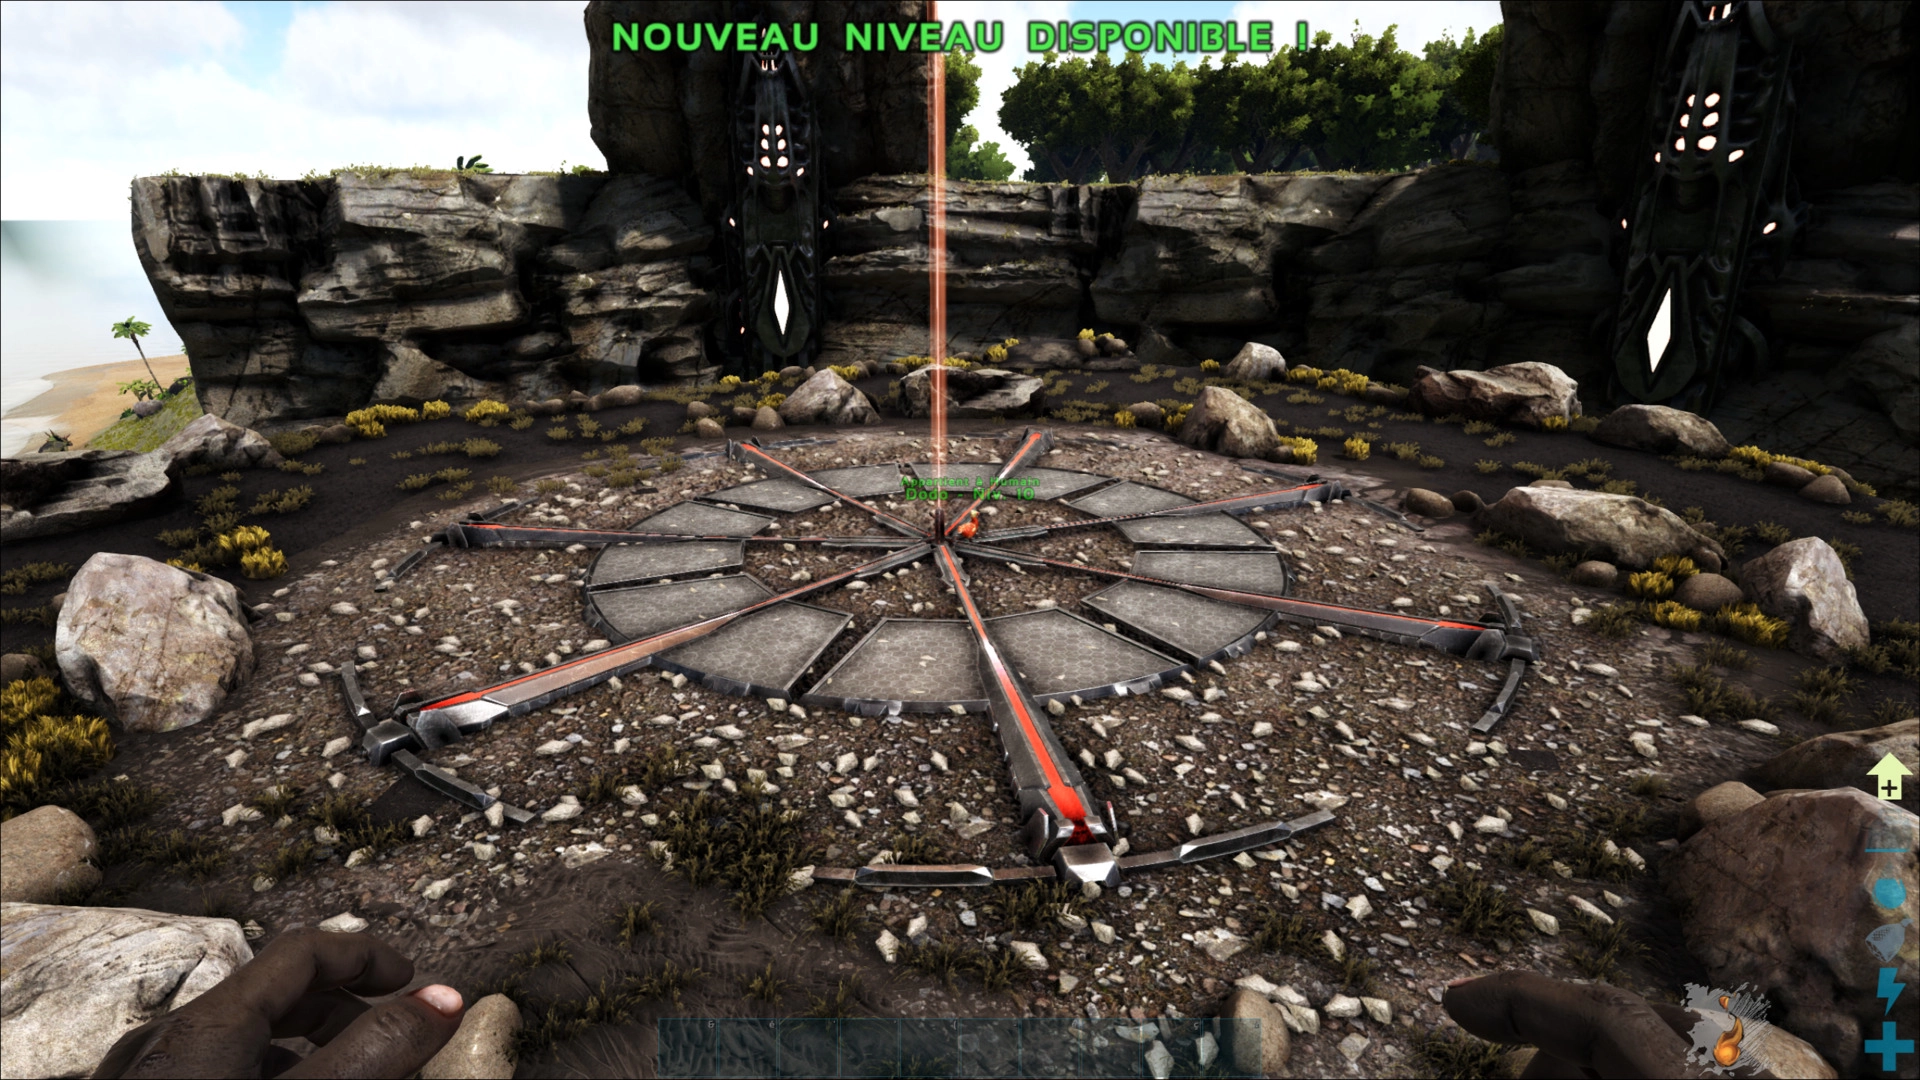
Open the obelisk interface, then use Transfer To to move your character.
To transfer a creature nearby, use Upload Creature.
On another server in the cluster, retrieve the creature at an obelisk via Creature List.
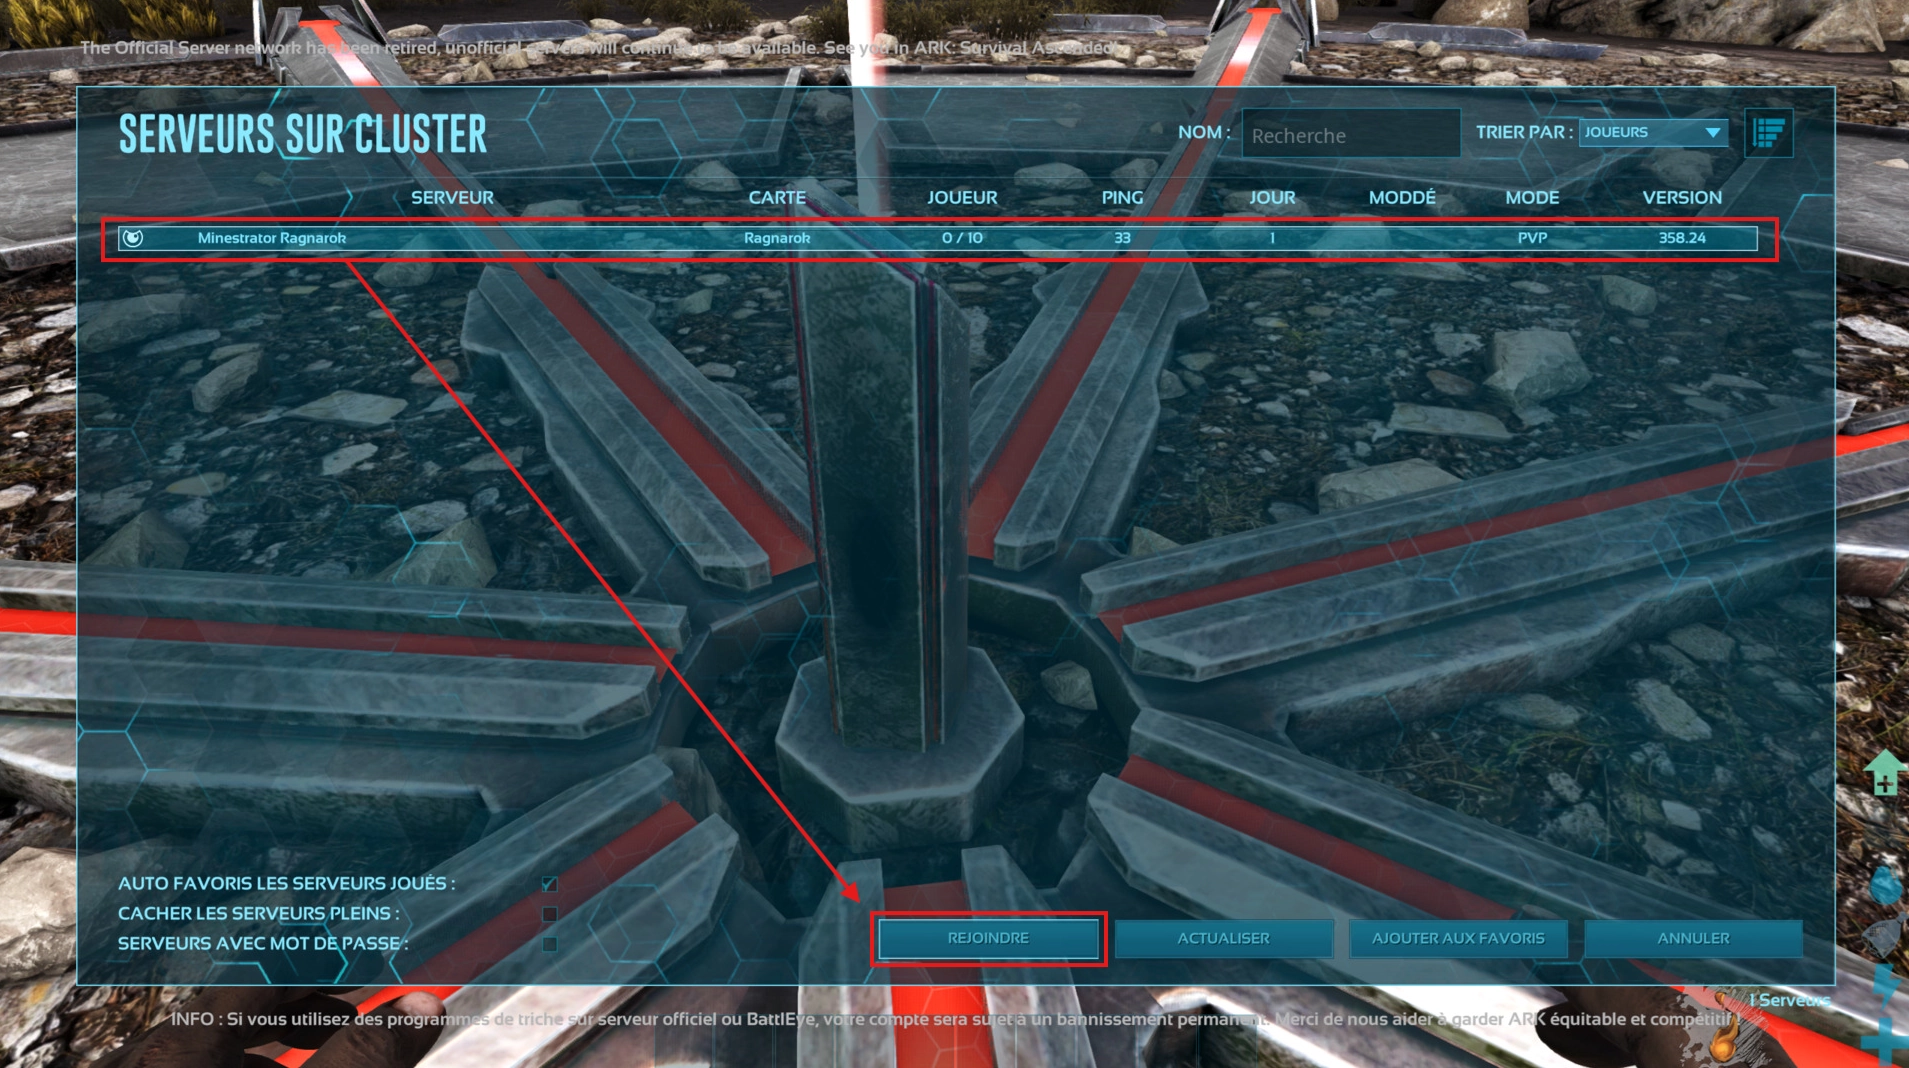
After clicking Transfer To, check the list of servers linked to the cluster.
Select your destination server and click Join.
Confirm the transfer: you should keep your survivor and still have your items.
💡 Tip: Test with a “throwaway” dino first. Once you’re confident, move the good stuff.
Questions frequent
Do I need special settings to create an ARK cluster?
No. On MineStrator, you create the cluster in the panel, associate each server, then restart. The cluster becomes available across your ARK servers automatically once it’s created.
Why don’t I see my servers in “Transfer To”?
Most of the time, one server isn’t associated with the cluster, or it wasn’t restarted after linking. Double-check the cluster association on every map, then restart the servers.
Can I link France and US servers in the same cluster?
Yes. You can create inter-regional clusters between France and US servers. The setup is the same as a standard cluster: associate the server to the cluster and restart.
Can one server be in two clusters?
No. A single ARK server can only belong to one cluster at a time. If you need different networks (PvP vs PvE), create separate clusters and assign servers accordingly.
Conclusion
Your ARK cluster is now ready: your servers are created, linked, and tested through an obelisk transfer. With this setup, you can run multiple maps like one connected world, keeping progression smooth and your community engaged.
Need help troubleshooting or planning a bigger multi-map network? Check the FAQ or reach the team via Support. If you don’t have a server yet, you can host ARK: Survival Evolved on MineStrator and scale up anytime.

 Enjoy 10% off your first month of server with MineStrator using the code ACTU10!