


Your Rust server feels a bit too “vanilla” for your taste? Plugins are the fastest way to level it up, whether you want better admin tools, quality-of-life tweaks, or custom gameplay features.
In this 2026 guide, you’ll learn how to enable the Oxide modding framework on your Rust server, upload your first plugins, and find the config files. We’ll use two classic examples: an admin vanish plugin and a stack size plugin.
If you get stuck at any point, you can also browse our other MineStrator guides for more server tips and tutorials.
Enable Oxide on your Rust server
Before your Rust server can load plugins, you must select the right modding framework in your MineStrator panel. Without this step, the server will simply ignore any plugin files you upload.
Go to the Parameters tab (1), then find the Framework de modding field (2). The label may still appear in French while our localization tools are being upgraded.
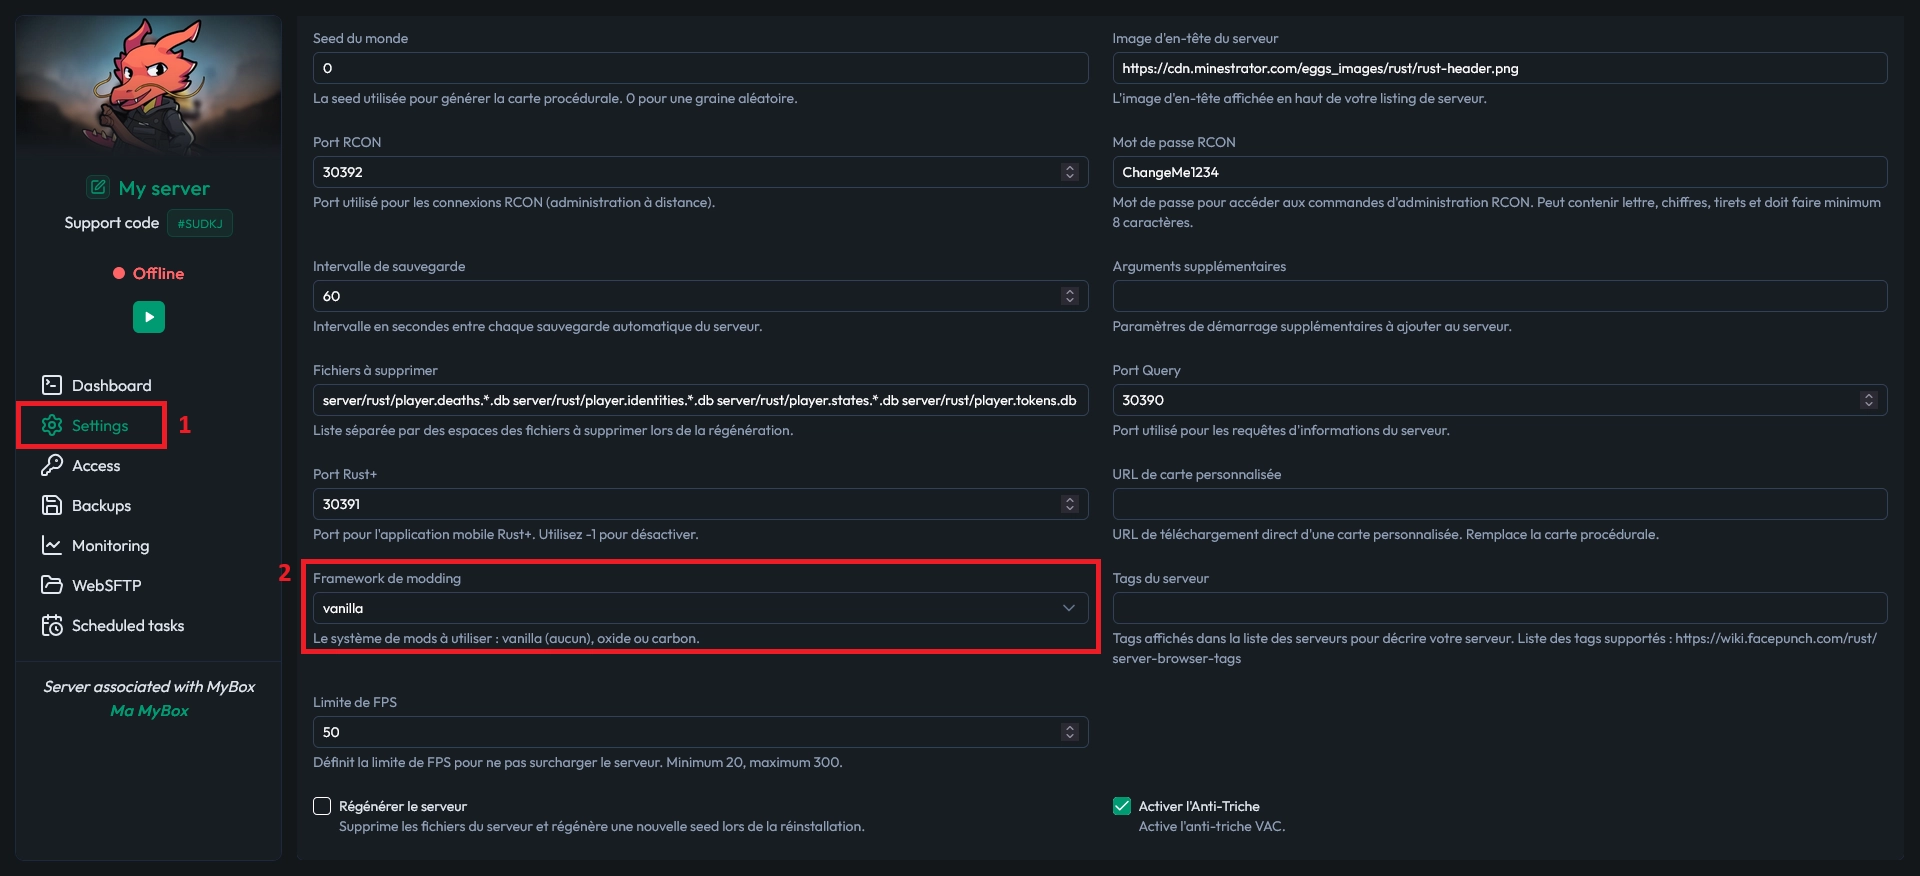
You’ll see three possible values. Here’s what they mean, so you pick the right one.
vanilla: no plugins, everything is ignored
oxide: loads Oxide plugins (the option you want here)
carbon: newer framework, but fewer plugins available
📝 Note: Carbon can be great for some setups, but Oxide still has the widest plugin ecosystem in 2026.
Select oxide, save your changes, and restart your server.
Download the Oxide plugins you want
Next, grab the plugins you want from the internet. For this tutorial, you can use a vanish plugin (handy for admins) and a stack size plugin (great for QoL on modded or community servers).
Make sure you download plugin files in the correct format for Oxide, usually a .cs file. Keep them ready on your computer before you start uploading.
⚠️ Warning: Only download plugins from trusted sources. A malicious plugin can compromise your server or ruin your players’ experience.
Upload plugins to the right folder
After the first restart with Oxide enabled, your server will generate new folders automatically. Once the server is back online, open the WebSFTP tab in your panel (or connect using an SFTP client).
Then browse to the oxide/plugins directory and upload your plugin files into that folder.
💡 Tip: If you don’t see the
oxidefolder yet, restart once more. It usually appears after Oxide initializes fully.
Restart your server again to load the plugins. If everything is correct, they should be active as soon as the server finishes booting.
Configure plugins and apply changes safely
Many Oxide plugins generate configuration files automatically. If a plugin supports config, you’ll typically find it in the oxide/config directory after the plugin has been loaded at least once.
Edit the config file, save it, then restart the server to apply changes, unless the plugin provides a command to reload its configuration from disk.
🚨 Important: Always restart after config edits unless the plugin explicitly supports a reload command, or your changes may not apply.
Questions fréquentes
Why doesn’t my Rust server detect the plugins?
Most of the time, the framework is still set to vanilla, or the files were uploaded outside oxide/plugins. Confirm the framework is oxide, then restart and check the folder path again.
Where are Oxide plugin configuration files stored?
Config files are usually generated in oxide/config after the plugin loads once. If the folder is empty, restart the server and verify the plugin file is valid and placed in oxide/plugins.
Do I need to restart after installing or editing a plugin?
Yes, a restart is the safest default. Some plugins offer a reload command, but if you’re not sure, restart the server to avoid half-applied settings.
Conclusion
You now know how to enable Oxide, upload plugins, and manage configs on your Rust server. With the right plugin stack, you can seriously improve admin control and player comfort in just a few minutes.
Need a Rust server to try this right away? Launch yours on MineStrator via our Rust hosting offers, or contact our team through Support if you want help choosing the best setup.

 Enjoy 10% off your first month of server with MineStrator using the code ACTU10!