
Recovering only your Minecraft world
You want to download your Minecraft server map without dragging everything else with it (plugins, configs, etc.)? That is exactly what recovering only the world does. It is perfect if you want to play your map in singleplayer, move to another host, or keep a clean local backup.
In this guide, you will learn how to find the right world folder, compress it from the MineStrator panel, download it to your PC, and handle the special case of moving a Spigot/Paper world to Vanilla. Follow the steps and your world will be safely stored on your computer in just a few minutes.
What a Minecraft world actually contains
Recovering only the world of your Minecraft server means downloading the map and all data linked to it, without including the full server installation. This difference is key if you want to avoid moving useless files or anything tied to a specific host or setup.
✅ What you get when you download the world:
All builds and terrain modifications
Chests, shulkers and their contents
Entities (animals, villagers, named mobs, etc.)
Generated structures (villages, fortresses, temples, etc.)
Player progress (position, levels, inventories, stats, advancements), except data specific to some mods
Datapacks used in this world
❌ What you do NOT get with the world:
Plugins (Spigot/Paper/Bukkit) and their configuration files
Mods installed on the server
Permissions, groups and player ranks
Server settings (
server.properties, motd, slots, etc.)
💬 Good to know: To play the same world with the same plugins or mods, you will need to reinstall them separately on the new server.
Why recover only the Minecraft world?
Downloading only the world of your Minecraft server is useful in many scenarios. You save time, disk space, and you avoid moving technical files that belong to the original hosting environment.
When this method is especially useful
Server migration: Move your world to another host or a fresh server without starting from scratch.
Local backup: Keep a copy of your worlds on your PC so you can archive them or restore them later.
Version change: Switch from Spigot/Paper to Vanilla (or the other way around), or change modded versions while keeping the same map.
Map sharing: Share your creation with other players, content creators, or friends.
📝 Note: The world can then be used in singleplayer, on another Minecraft server, or as the base for a brand-new project.
Step 1: Access your Minecraft server files
Before you can download the world from your Minecraft server, you need to access the files through the MineStrator panel. Everything is done directly from your browser, no FTP client is required.
1.1 Open the Files tab
Log in to your MineStrator account and open the panel. Click on the server you want to manage to display its dashboard and main information.
Always shut down your server before editing or downloading files. This prevents world corruption and ensures you get a clean backup of your map.
Once the server is stopped, click the Files button in the menu on the left of the console to access your server file tree:
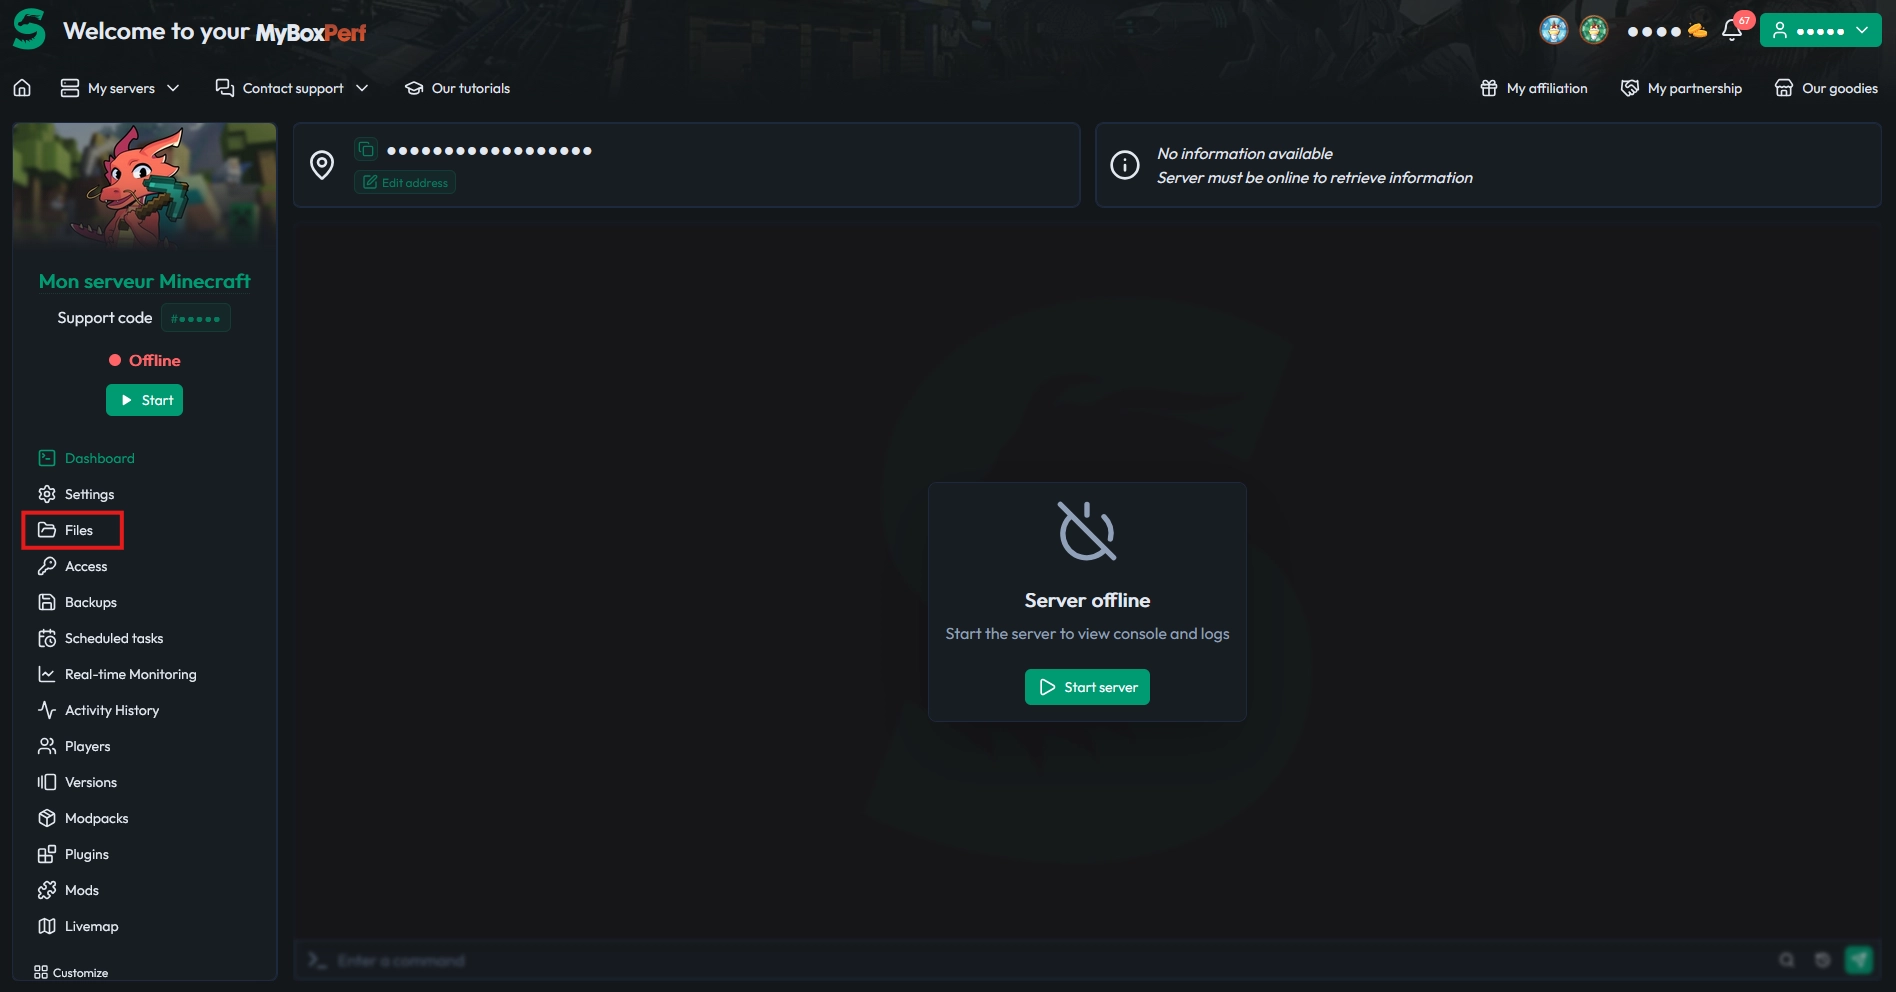
⚠️ Warning: Do not edit or delete files while the server is running, or you may corrupt the world.
1.2 Browse through the server files
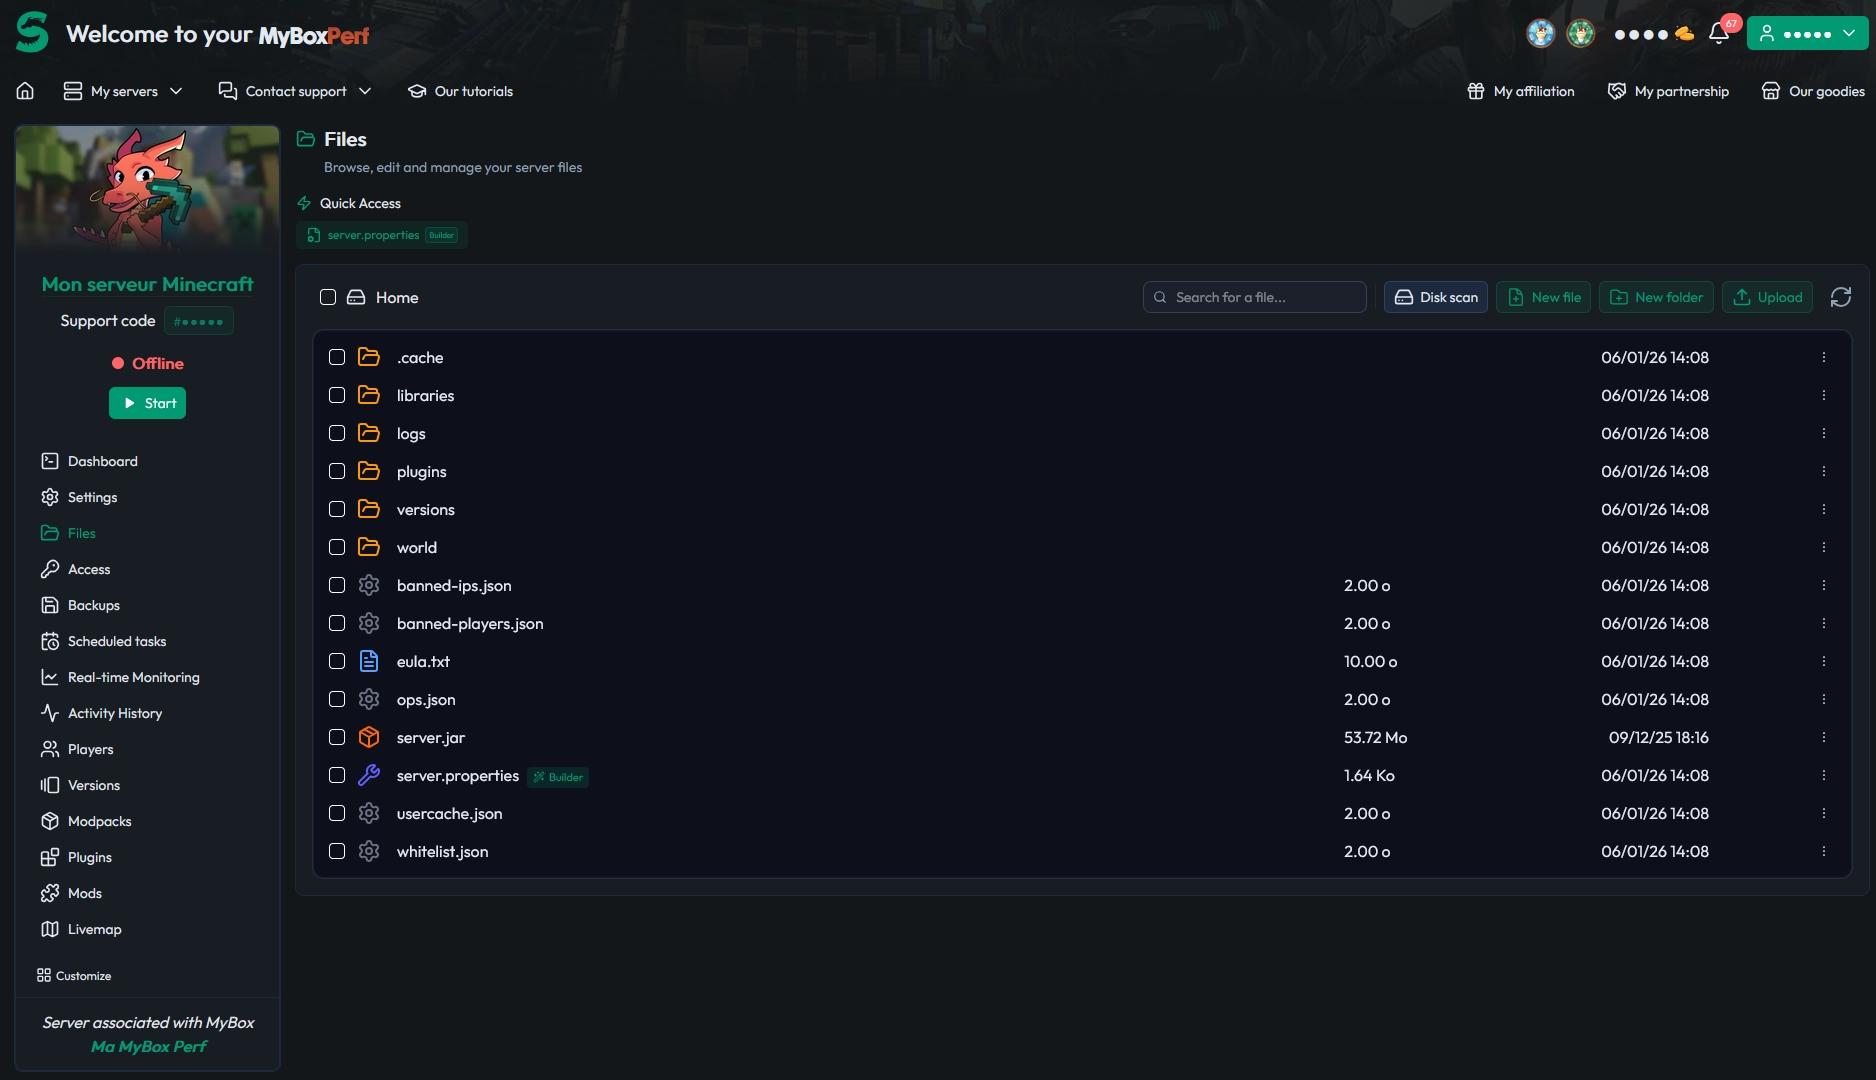
In the Files tab, you see the full file structure of your Minecraft server. The interface works like a classic file explorer: folders, files, and actions via right-click.
From here, you will locate your world folder, compress it, and then download it to your computer.
Step 2: Identify your Minecraft world folder
The location and structure of your Minecraft world depend on the type of server you are running: Vanilla/Forge/Fabric or Spigot/Paper/Bukkit. The folder layout is not the same, so you need to be sure you grab the correct directories.
2.1 World on a Vanilla, Forge or Fabric server
On a Vanilla, Forge or Fabric server, the world is stored in a single folder. By default, this folder is named:
world(default world name)Or the custom name defined in the
server.propertiesfile (keylevel-name)
Here is a typical structure inside the world/ folder:
world/
├── DIM-1/          <-- The Nether
├── DIM1/           <-- The End
├── data/
├── datapacks/
├── entities/
├── playerdata/
├── poi/
├── region/         <-- Overworld chunks
├── stats/
├── level.dat       <-- Main world data
└── level.dat_old   <-- Previous backup
💡 Tip: If you are unsure about the world name, open
server.propertiesand check the value oflevel-name.
2.2 World on a Spigot, Paper or Bukkit server
Bukkit-based servers (Spigot, Paper, Purpur, etc.) use a different layout for dimensions. Each dimension is stored in its own separate folder at the root of the server.
By default, you will see:
world: the Overworld (main world)world_nether: the Netherworld_the_end: the End
Example structure with Spigot/Paper:
Server root/
├── world/              <-- Overworld only
│   ├── data/
│   ├── entities/
│   ├── playerdata/
│   ├── region/
│   └── level.dat
├── world_nether/       <-- Nether
│   └── DIM-1/
└── world_the_end/      <-- End
    └── DIM1/
📝 Note: To back up your full world on a Spigot/Paper server, you must download all three folders together.
2.3 World with a custom name
If you changed the world name (for example SurvivalCraft), the folders will use that name instead of world. This applies to both Vanilla and Spigot/Paper setups.
Vanilla version:
SurvivalCraft/Spigot/Paper version:
SurvivalCraft/,SurvivalCraft_nether/,SurvivalCraft_the_end/
💬 Good to know: The folder prefix (for example
SurvivalCraft) stays the same; only the suffixes_netherand_the_endchange.
Step 3: Compress your Minecraft world folder
To download your Minecraft server world easily, the best option is to compress it into a ZIP archive directly from the MineStrator panel. That way you only download a single file instead of hundreds or thousands.
3.1 Use compression in the WebSFTP
From the Files tab on the panel:
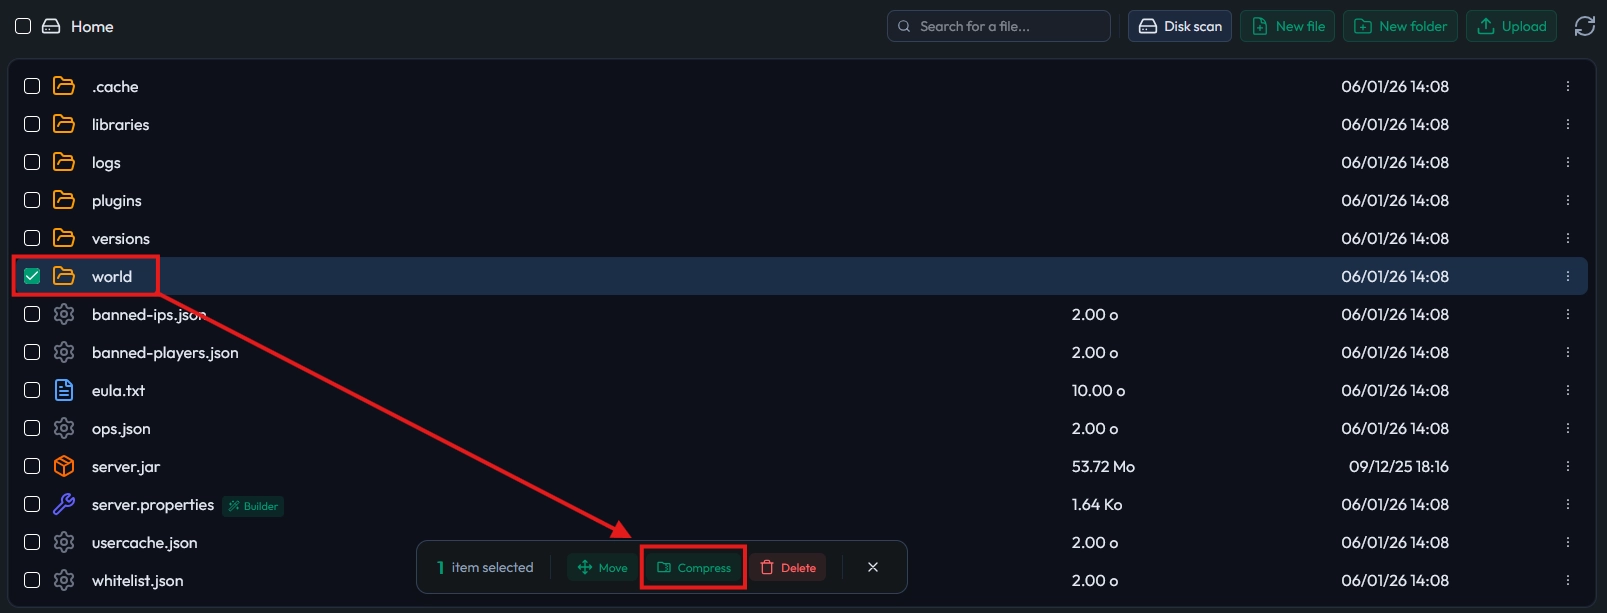
Select the world folder(s):
Tick the checkbox next to the
worldfolder (or your custom world name)On Spigot/Paper, select the three folders (
world,world_nether,world_the_end) at the same timeStart the compression:
Click the Compress button in the floating menu at the bottom of the page
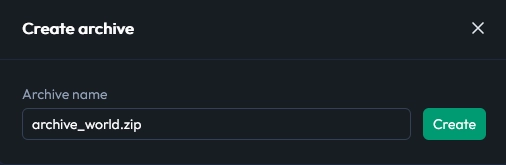
Choose an archive name:
For example:
archive_world.zipConfirm the creation:
Click Create to launch the compression
💡 Tip: Compression time depends on the size of your world. The more your players explored, the heavier the archive will be.
Step 4: Download the world archive
Once the ZIP archive is created, you can finally download your Minecraft server world to your PC. This archive contains all the folders you selected in the previous step.
To download the archive:
Locate the ZIP file in the current folder (the archive is created in the directory you were in when you launched compression)
Right-click the archive and select Download
The file will be saved to your default download folder on your PC (usually Downloads)
📝 Note: Keep this archive safe, it is your full world backup on the map side.
Special case: from Spigot/Paper to Vanilla
If you want to use a Spigot/Paper world in singleplayer or on a Vanilla server, you need to adapt the folder structure. Vanilla expects Nether and End dimensions to be stored inside the main world folder, in DIM-1 and DIM1.
Why this conversion is needed
On a Spigot/Paper server, dimensions are split into three folders (world, world_nether, world_the_end). In singleplayer or on a Vanilla Minecraft server, the game expects the DIM-1 (Nether) and DIM1 (End) folders directly inside the main world folder.
🚨 Important: Without this merge, your portals may generate brand-new empty dimensions, as if you had started a fresh map.
How to convert Spigot/Paper worlds to Vanilla
1. Extract the archive you downloaded
On your PC, right-click world_backup.zip and choose Extract. You will get several folders corresponding to the dimensions of your Minecraft server.
2. Make sure you have these three folders:
world/: contains the Overworldworld_nether/: contains the Nether in aDIM-1subfolderworld_the_end/: contains the End in aDIM1subfolder
3. Merge dimensions into the world folder
For the Nether:
Open the
world_nether/folderCopy the
DIM-1folder inside itPaste this
DIM-1folder directly intoworld/
For the End:
Open the
world_the_end/folderCopy the
DIM1folder inside itPaste this
DIM1folder directly intoworld/
4. Check the final world structure
At the end of the process, your world/ folder should look like this:
world/
├── DIM-1/          <-- Merged Nether
├── DIM1/           <-- Merged End
├── data/
├── datapacks/
├── entities/
├── playerdata/
├── poi/
├── region/
├── stats/
├── level.dat
└── level.dat_old
5. Remove folders you no longer need
Once the DIM-1 and DIM1 folders are copied into world/, you can delete the separate dimension folders:
world_nether/(now empty or containing only leftover files)world_the_end/(same situation)
💡 Tip: Keep a copy of the original ZIP archive in case you ever need to roll back.
Check that the conversion worked
Once your Minecraft world is converted for Vanilla, you should test that everything works correctly: world loading, portals, and builds in each dimension. This prevents bad surprises later on your server.
Place the world folder into the
savesdirectory of your local Minecraft installationLaunch the game and open the Singleplayer menu
Check that your world shows up in the list of available worlds
Test the portals:
Enter a Nether portal and confirm your original Nether is loaded
Use an End portal to verify your builds and the state of the End
Inspect your builds in each dimension to spot any missing or regenerated chunks
⚠️ Warning: If the world does not appear in Singleplayer, check that it is not still compressed (ZIP) and that the
level.datfile is at the root of the world folder.
Common issues when recovering a Minecraft world
When you recover or convert a Minecraft world, a few recurring problems can appear. Here is how to identify and fix them quickly so you can get back to playing.
Dimensions look reset or brand-new
If the Nether or the End look fresh (without your builds), it usually means the DIM-1 or DIM1 folders are not in the right place.
Double-check that:
The
DIM-1andDIM1folders are directly insideworld/You did not create an extra subfolder (for example
world/world/DIM-1)
The world does not appear in singleplayer
If your world is missing from the Singleplayer list:
Make sure the world folder is not still compressed as a
.zipCheck that the level.dat file is present at the root of the
worldfolderConfirm that the world folder is directly inside
.minecraft/saves/and not nested in another folder
Missing or corrupted chunks
If some areas of the map look missing or replaced by new terrain:
Check that all
.mcafiles were copied correctly into theregion,DIM-1andDIM1foldersMake sure no transfer was interrupted during copy or compression
💬 Good to know: If you are unsure, start again from the original ZIP archive and redo the conversion step by step.
Conclusion
You now know how to recover only the world of your Minecraft server, compress it via the MineStrator panel, download it, and even convert a Spigot/Paper world to Vanilla. With these steps, your maps are safe and ready to be played again wherever you want.
If you run into any issues during the process, you can reach our team through the MineStrator support page or check our FAQ for quick answers. Do not have a server yet, or want to start a fresh project on a new world? Try a free 12-hour Minecraft server, no credit card required, and launch your next adventure in just a few minutes.

 Enjoy 10% off your first month of server with MineStrator using the code ACTU10!