

You want to use a custom Bedrock map on your Bedrock dedicated server? You’re in the right place. In this guide, you’ll learn how to install a Bedrock map step by step, whether it comes from your solo world or from the internet.
We’ll see how to create a clean Bedrock server, export or prepare your map in .mcworld/.zip format, upload on your server, and finally link it in the server.properties file. Follow each step carefully and your Bedrock map will be online in a few minutes.
🚨 Important: Always turn your Bedrock server off before modifying or replacing a world, or you risk corrupting it.
Create the Bedrock server from the panel
First, you need a clean Bedrock server to host your map. On your MineStrator panel, open your server and go to the Versions tab. Select Bedrock, then click on Reinstall the server.
This operation will delete all current content on the server (world, plugins, configs). Once the reinstall is done, start the server once to complete the Bedrock installation, then stop it again before going further.
⚠️ Warning: Reinstalling the server is irreversible. Make a backup of your old world if you want to keep it.
Prepare your Bedrock map file
To install a Bedrock map on your Bedrock server, you must have it in a .mcworld file (which is basically a compressed archive similar to .zip). This applies whether the map comes from your solo game or from a download site.
Export a solo Bedrock world
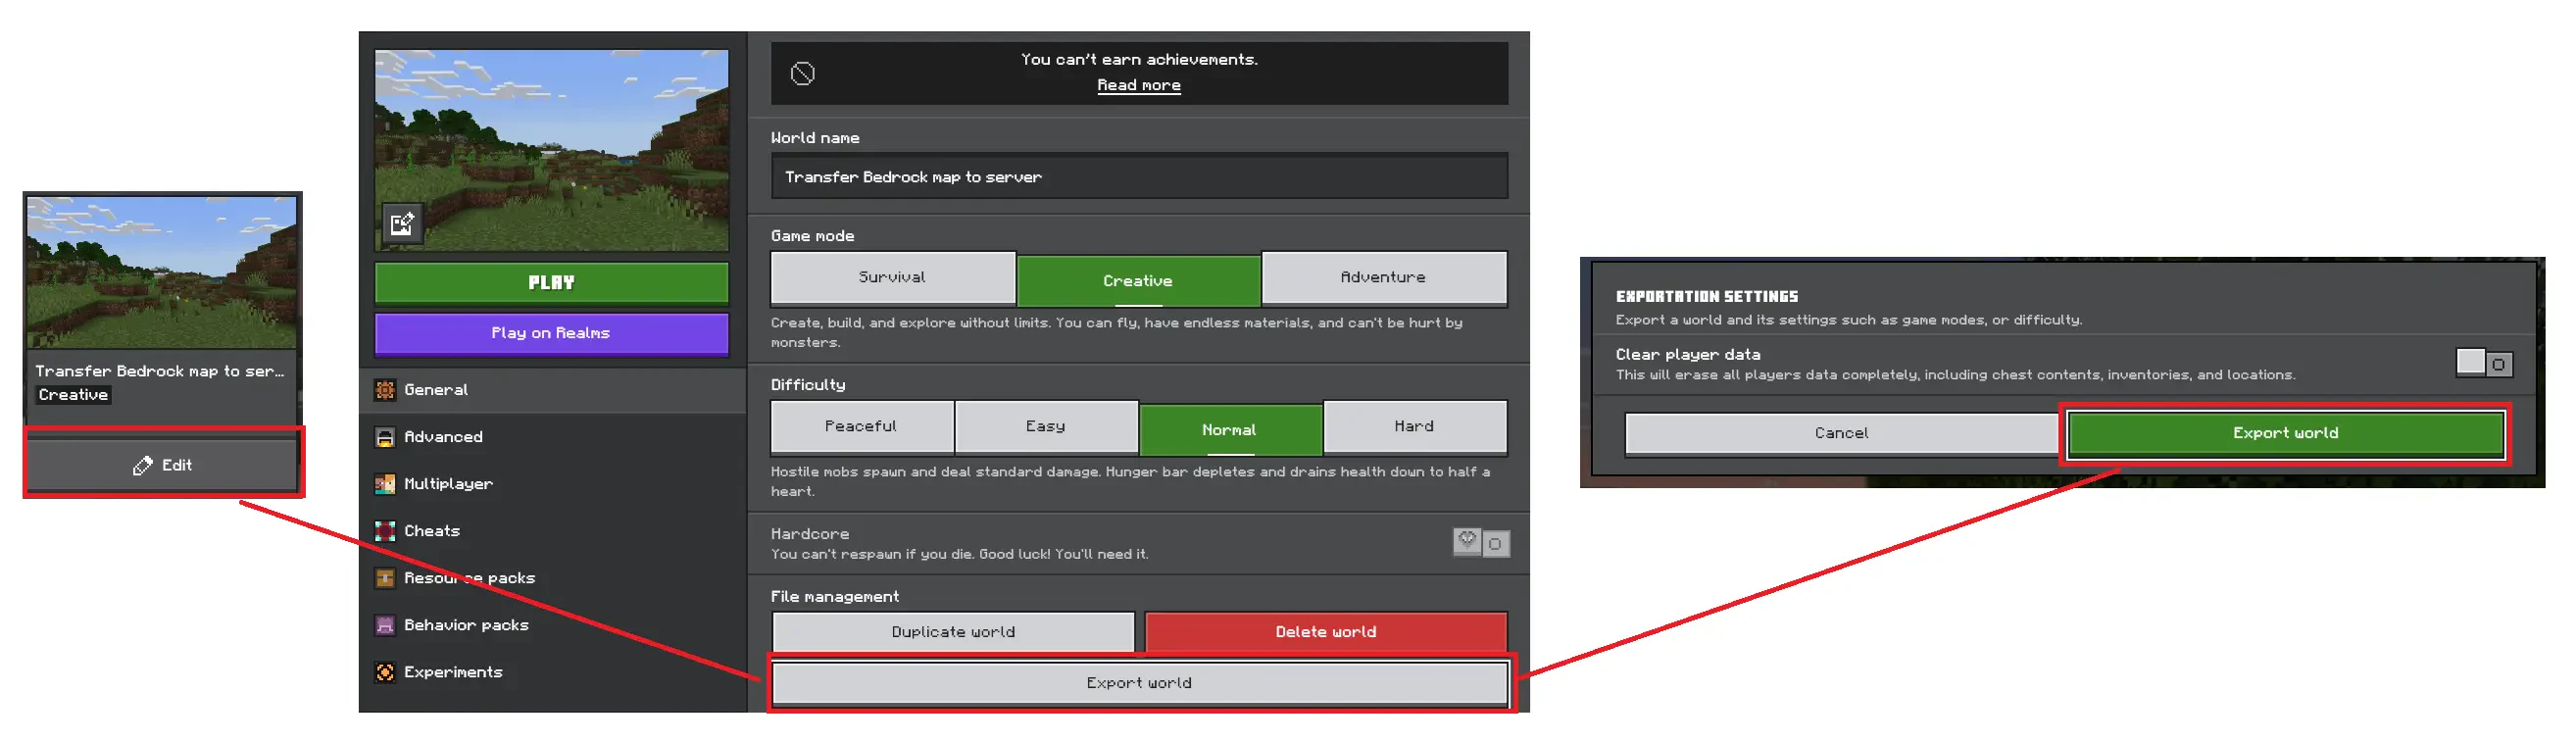
If your map is a solo world, open Minecraft Bedrock and go to your world settings from the game menu. In the General section, click on Export world and choose a destination on your computer. The game will export your map as a .mcworld file.
Use a Bedrock map downloaded online
If your Bedrock map comes from the internet, you should get either a .mcworld file or a .zip archive. Both formats are fine; we’ll convert them if needed in the next step before uploading the map to your Bedrock server.
Convert and check the map archive
Once you have the map, make sure you end up with a .zip archive. If your file is in .mcworld format, simply rename the file extension from .mcworld to .zip. Then open the .zip file to verify its internal structure.
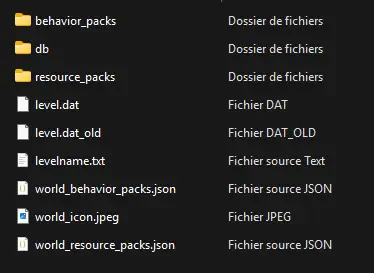
A typical Bedrock map folder usually contains a db folder and files like level.dat and levelname.txt. You may also see folders such as behavior_packs and resource_packs, but they are not always present and that’s perfectly normal.
📝 Note: If you only see another folder inside the archive (for example a single parent folder), you’ll need to extract it and use the inner folder contents when uploading to the server.
Upload the Bedrock map to the server
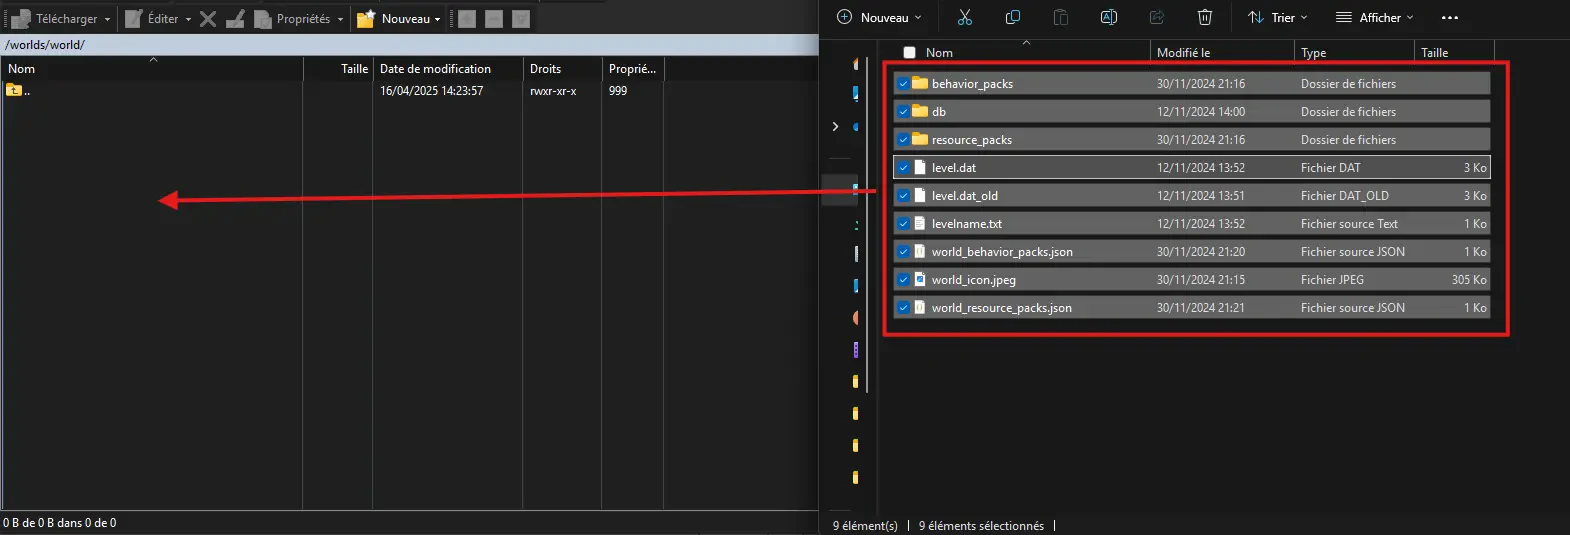
From this point on, your Bedrock server must stay turned off while you manipulate the world files. In your Files tab on the panel, browse to the server directory and open the /worlds/ folder. Inside, create a new folder which will host your imported map.
Choose a simple name for this folder and remember it. In this tutorial, we’ll call it world, which is also what we recommend for simplicity. Then extract your .zip map archive on your computer and drag all its contents into this new world folder.
When the transfer is complete, go back to the root of your Bedrock server files and open the server.properties file with the built‑in editor of your client or by downloading and editing it locally.
💬 Good to know: If your map is very large, the upload can take a while. Avoid interrupting the transfer to prevent corrupted files.
Set the world name in server.properties
In server.properties, look for the line starting with level-name=. This value tells the Bedrock server which world folder inside /worlds/ it should load at startup. Replace the current value with the exact name of the folder you created earlier (for example world).
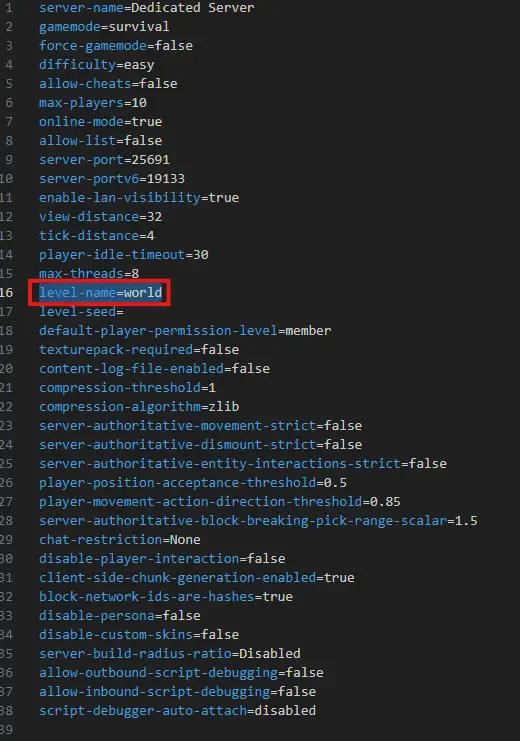
Save the server.properties file, then restart your Bedrock server from the panel. Once it is online, join the server from your Bedrock client to confirm that your custom map has loaded correctly and everything looks as expected.
📝 Note: If the server starts but you still see the default world, double‑check the spelling of
level-nameand the folder name in/worlds/.
Conclusion
You now know how to install a Bedrock map on your Bedrock server: create a clean Bedrock instance, export or download the map, prepare the .zip archive, upload it via the Files tab, and point level-name to the right folder. Your players can now explore your custom world together.
If you get stuck on any step or your Bedrock server refuses to load the map, our support team is here to help you on Discord or via ticket directly on the site. And if you don’t have a Bedrock server yet, discover our MineStrator offers and launch your world online in just a few minutes.

 Enjoy 10% off your first month of server with MineStrator using the code ACTU10!