

Your server needs a fresh map? You’re in the right place. This tutorial will walk you step by step through installing a new Minecraft map on your server, without breaking anything.
Before you touch any files, make sure your server is fully stopped from your panel. Editing a world while the server is running can corrupt your map and cause serious issues.
Step 1: Delete your old world files
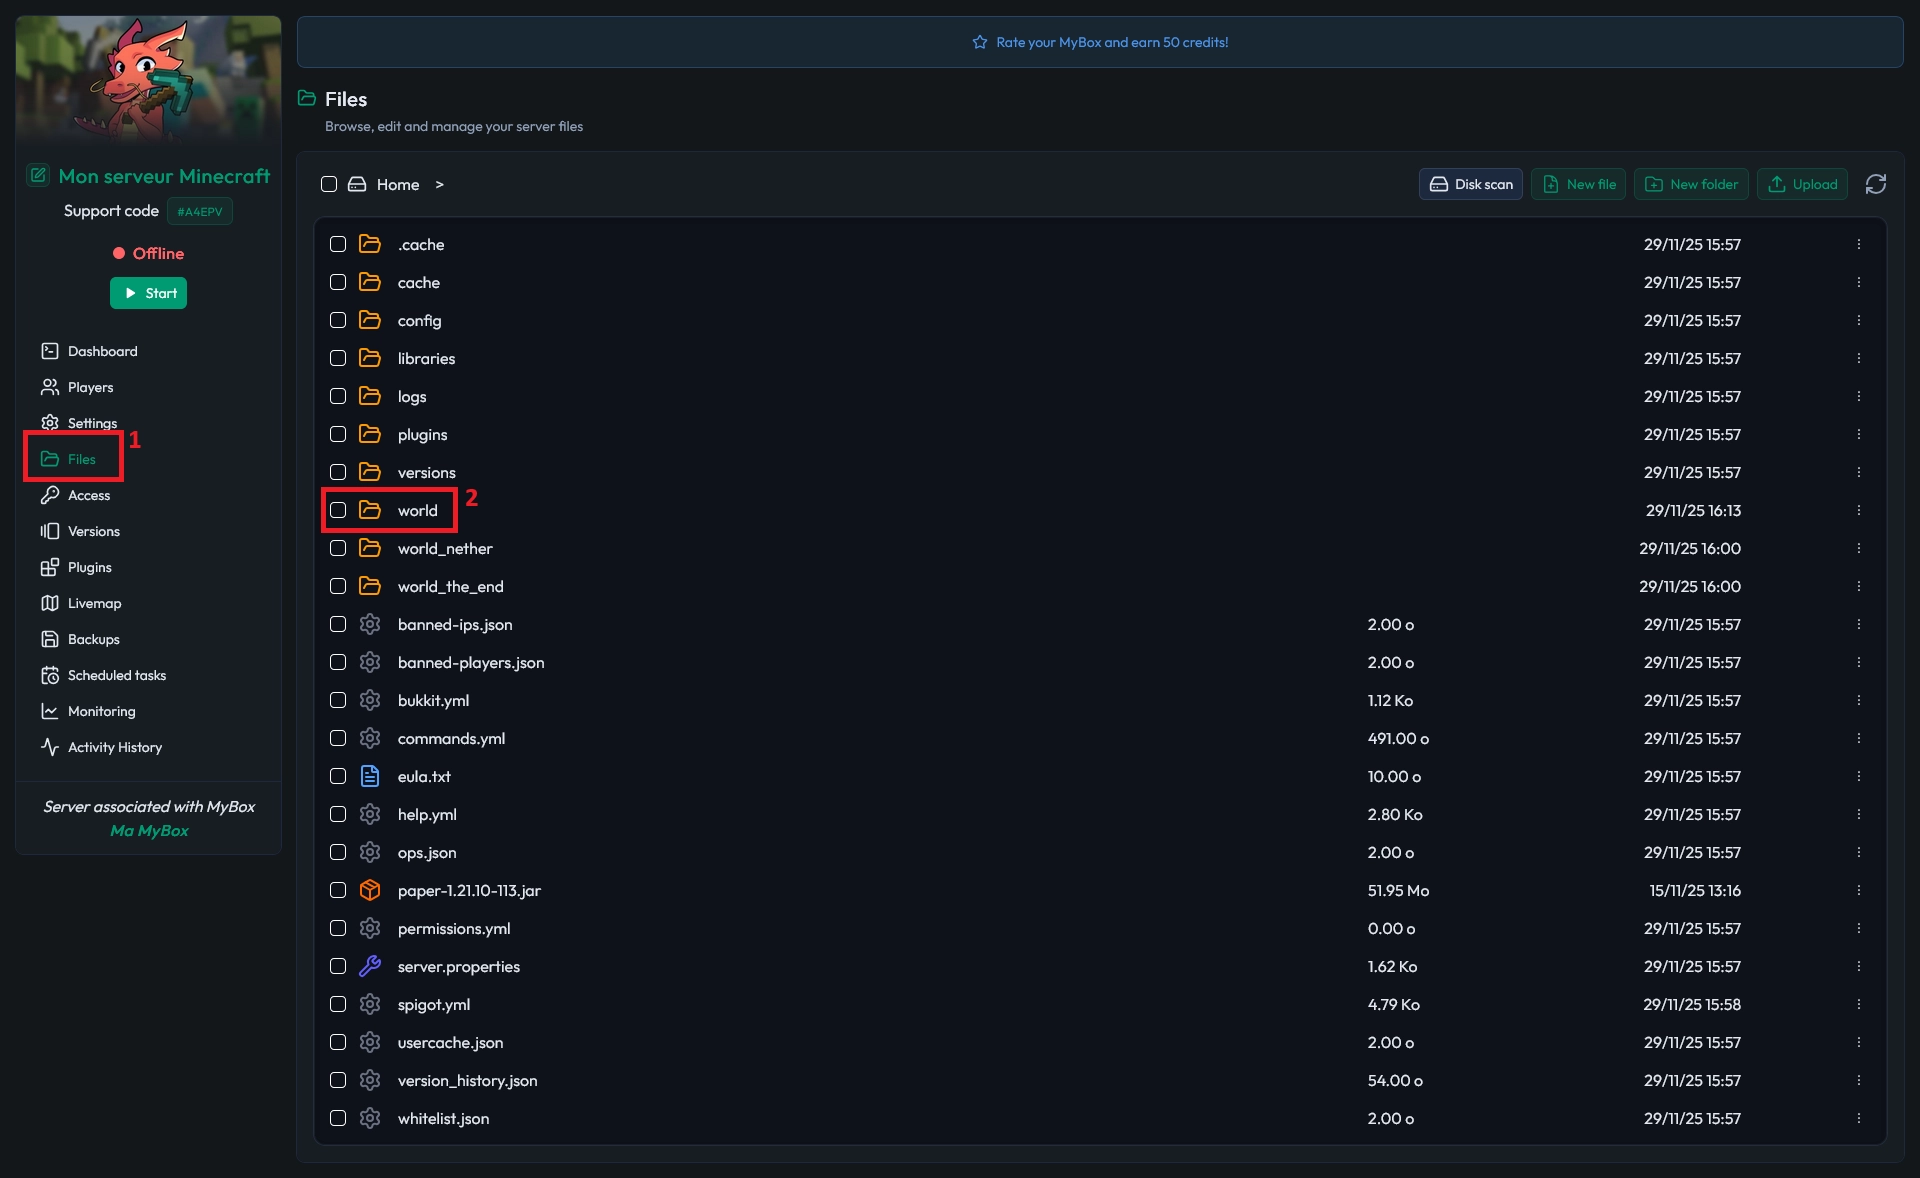
The first step to install a new Minecraft map on your server is to remove the current world. Open your server panel and go to the Files tab. Look for your world folder: if you never changed it, it is usually called world. Click it to open the folder.
Select every file and folder inside this world directory, then delete them. You must keep the folder itself, but its content has to be completely empty before you upload the new map.
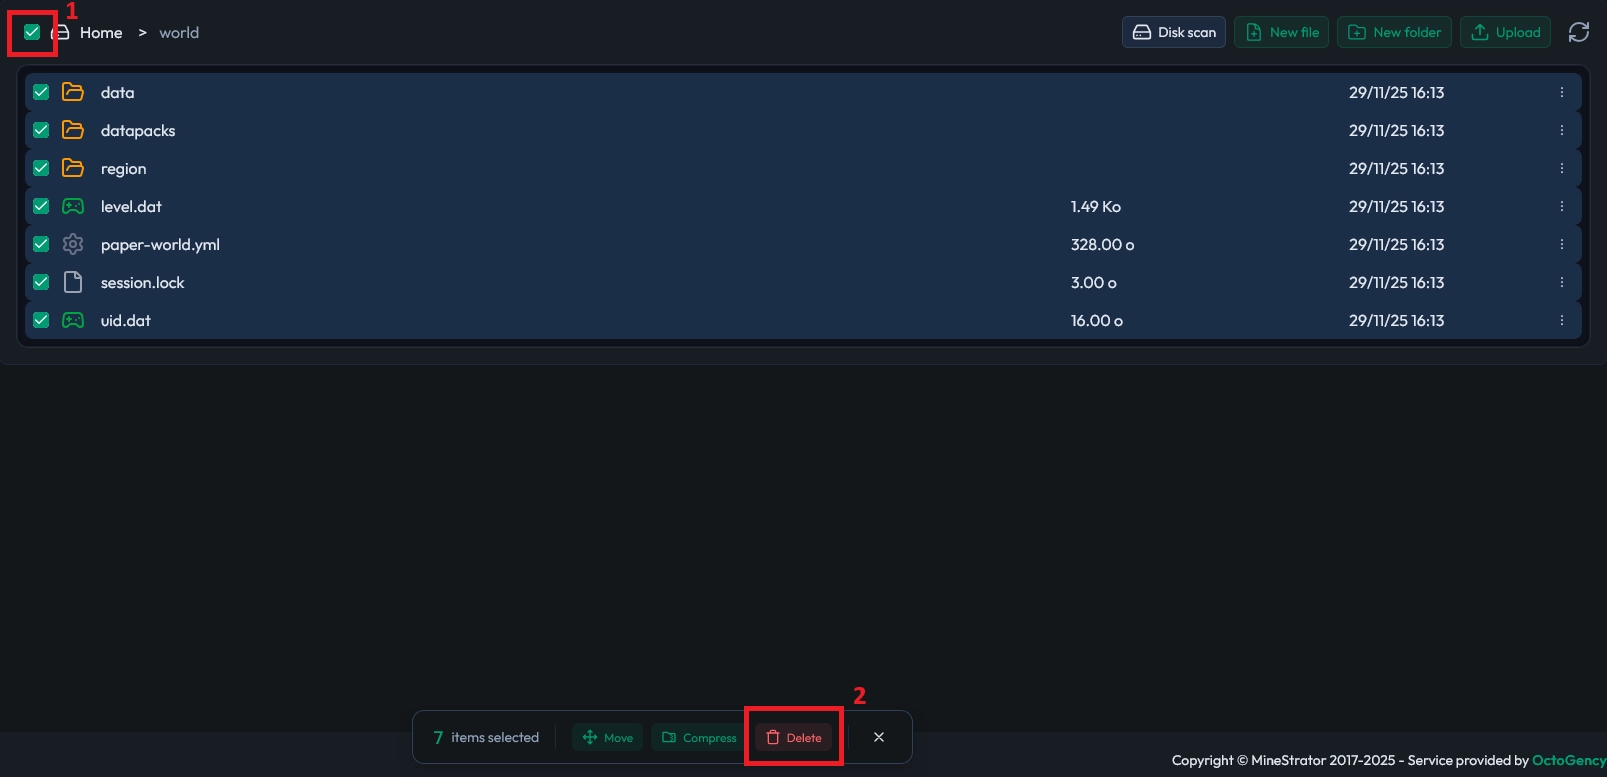
⚠️ Warning: Once deleted, your old world is gone unless you have a backup. Download a copy first if you might want to restore it later.
Step 2: Find the correct world folder name
Before transferring your new map, you need to know exactly which folder your Minecraft server uses as its main world. By default, most servers load the map from the world folder, but this can be changed in the configuration.
If you are not sure, open the server.properties file from your file manager. Look for the line with level-name. The value on this line is the name of the folder where your main world must be placed.
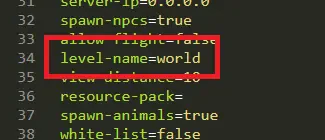
If a folder with this name already exists and contains files, it is usually a default world generated when the server started. You can safely delete it if you no longer need it, or rename it to keep a backup, as long as the new name is different from the one in level-name.
💡 Tip: To switch between several maps later, you can keep multiple world folders and just change the
level-namevalue to point to the one you want.
Step 3: Upload your new Minecraft map
Once your target world folder is empty and you know its correct name, you can upload your new map. A Minecraft map is made of several files like level.dat and session.lock, and folders such as data and region.
Open the downloaded map on your computer, then upload all of its content directly inside the empty world folder on your server. Do not create an extra subfolder: the files must be placed exactly at the root of the world directory.

📝 Note: If your map came in a ZIP file, extract it locally first. Upload the extracted files and folders, not the ZIP archive itself.
Step 4: Start the server and test the map
After the transfer is complete, go back to your panel and start your server. Wait for it to finish loading, then join from your Minecraft client. You should spawn in the new map and be able to explore it normally.
🚨 Important: If you still see the old world, double-check the
level-nameinserver.propertiesand make sure the map files are in the matching folder.
Conclusion
You now know how to install a Minecraft map on your server: clean the old world, check the level-name, upload the new files, and restart. Once this is done, you can enjoy custom adventure maps, lobby worlds, or huge survival spawns with your players.
If you run into any issues while installing your map, our team and community are there to help. Join the MineStrator Discord or explore our other tutorials to get the most out of your server.

 Enjoy 10% off your first month of server with MineStrator using the code ACTU10!